Skip to content

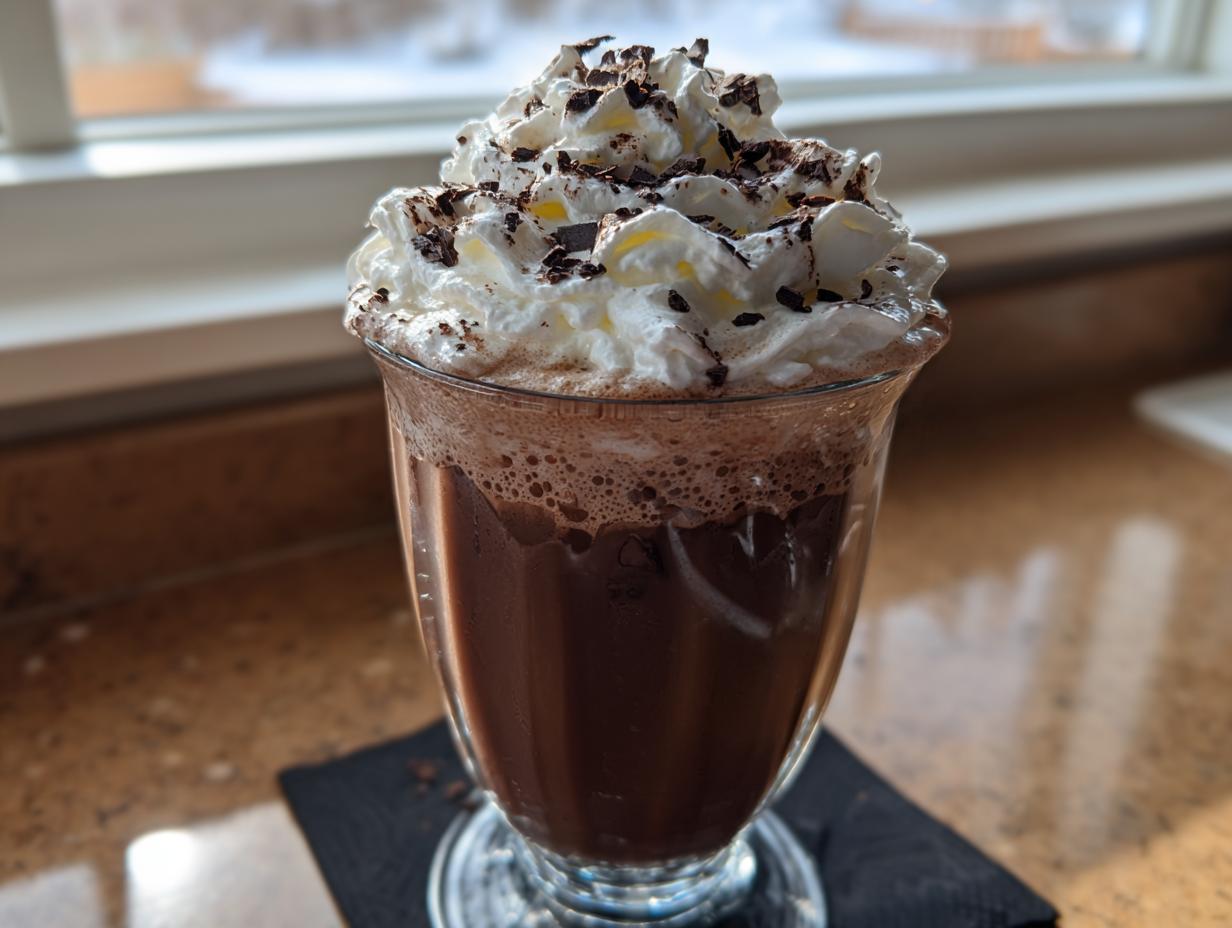
No heading needs to be written for the introduction. Hi, I’m Anna! 👩🍳 Cooking is my passion, and here on Mom’s Kitchen I share simple, delicious recipes that bring joy and warmth to your table. I truly believe that amazing food doesn’t need complicated techniques or hours in the kitchen. Whether you love spending time baking or you’re just looking for easy ideas for impressing guests, I’m so happy to inspire you with my recipes. We’re diving straight into the holidays today with something truly decadent but shockingly simple: the **Chocolate Peppermint Mousse: Festive & Easy2026**. Thank you for being part of this flavorful journey! 💛
When the weather turns cold and the lights start twinkling, you need a dessert that tastes incredibly special without stressing you out. This mousse is the answer! It feels like something you’d order at a fancy restaurant, but I promise you, it comes together faster than you can find the perfect Christmas sweater. It’s the perfect no-bake solution for busy holiday schedules.
Why This Chocolate Peppermint Mousse: Festive & Easy2026 is Your Next Go-To Dessert
Honestly, what’s not to love about this **Chocolate Peppermint Mousse: Festive & Easy2026**? First off, it’s no-bake! That means no fiddling with oven temperatures or worrying about cakes sinking. It sets up beautifully in the fridge, leaving your oven free for roasting potatoes or baking cookies. It captures that perfect minty-chocolate flavor everyone craves this time of year, but it’s light—not heavy like a fudge cake.
It’s so easy, even if you’ve never made mousse before—seriously! The magic comes from folding air into rich melted chocolate. It looks impressive, which is why it’s my go-to when I need a guaranteed crowd-pleaser in under 30 minutes of active time. You get that huge festive payoff with minimal effort.
Assembling Your Chocolate Peppermint Mousse: Festive & Easy2026 Ingredients
Okay, before we get into the fun part—the folding—we need our players on the field. This **Chocolate Peppermint Mousse: Festive & Easy2026** relies on quality ingredients since there’s no baking to hide behind! Don’t worry about a massive shopping list; most of this is pantry staples, plus that wonderful chocolate we need.
Gather everything before you start melting, because once that chocolate is warm, you need to move! I always lay everything out on the counter so I can grab what I need instantly.
Essential Components for Your Chocolate Peppermint Mousse: Festive & Easy2026
- 8 ounces semi-sweet chocolate, chopped finely—use the good stuff, trust me!
- 2 tablespoons unsalted butter—no substitutes here, we need that rich texture.
- 1 teaspoon peppermint extract—start here, you can always add more later if you like it extra minty.
- 3 large eggs, separated—make sure those yolks and whites are totally separate!
- 1/4 cup granulated sugar—this goes straight into the egg whites.
- 1 cup heavy cream—needs to be cold for whipping.
Optional Garnishes for Presentation
This is where you make your **Chocolate Peppermint Mousse: Festive & Easy2026** look like it came from a magazine! These are totally optional, but they really make it feel special.
- Whipped cream (a dollop is always nice)
- Crushed peppermint candies or candy canes
- Chocolate shavings
- Fresh mint leaves for a little green pop
Step-by-Step Guide to Making Chocolate Peppermint Mousse: Festive & Easy2026
Alright, time to roll up those sleeves! This is the part where we turn simple ingredients into something truly magical. Remember, the secret to a beautiful mousse is gentle handling once we start mixing everything together. We want to keep all that lovely air we’re about to whip in!
Preparing the Chocolate Base
First things first, we need our chocolate foundation smooth as silk. You can use a double boiler, which is the safest bet, or if you’re feeling brave like I sometimes am, you can microwave it. If you microwave, do it in 20-second bursts, stirring well between each one. Don’t walk away! Chocolate burns fast, and nobody wants scorched chocolate in their **Chocolate Peppermint Mousse: Festive & Easy2026**.

Once the chocolate and butter are completely melted and glossy, take the bowl off the heat source immediately. We need it to cool just a touch before we add the yolks and extract. Stir in that teaspoon of peppermint extract now. It needs that slight warmth to bloom its flavor into the chocolate.
Mastering the Egg Whites and Whipped Cream
Now for the structure! Get your mixer out. We have two things to whip. First, the egg whites. Beat those three whites until they reach soft peaks—that means when you lift the whisk, the tip curls over slightly. Now, slowly rain in that 1/4 cup of sugar while the mixer is running. Keep going until you hit stiff peaks. When you pull the whisk out, the peak should stand straight up, proud as can be. Set that bowl aside—don’t let it touch any grease!
Next up is the heavy cream. Whip that until it just forms soft peaks too. I always stop right before it gets too stiff, because if you over-whip cream, you get buttery clumps instead of airy heaven. We want creamy, pillowy clouds here.
Combining and Folding the Mousse Layers
Time for the careful choreography! First, whisk your egg yolks until they look pale and creamy. Now, gently whisk in the slightly cooled chocolate mixture—if the chocolate is too hot, it will cook your yolks, and that’s no good! We want smooth chocolate yolks.
Here comes the folding, the most important step for your **Chocolate Peppermint Mousse: Festive & Easy2026**. Take about a third of those stiff egg whites and just stir them right into the chocolate mixture. Don’t worry about deflating this first batch; you’re just lightening the heavy chocolate base. Now, gently, gently, fold in the rest of the egg whites. Use a rubber spatula and cut down the middle, sweep up the side, and turn the bowl. Repeat until *almost* no white streaks remain. Overmixing here is the enemy!
Finally, gently fold in that softly whipped cream. Again, use that same gentle figure-eight motion until everything is just combined and looks uniform. You should have a light, airy chocolate batter!
Setting and Chilling Your Chocolate Peppermint Mousse: Festive & Easy2026
Spoon your beautiful batter right into your serving dishes—I love using small wine glasses or ramekins for individual servings. Cover them up tightly with plastic wrap. This **Chocolate Peppermint Mousse: Festive & Easy2026** needs time to firm up its structure. You must, I repeat, *must* refrigerate it for a minimum of two hours. If you rush this, it will be soupy! Four hours is better, but two hours is the absolute minimum for it to set correctly.
Quick Tips for Perfect Chocolate Peppermint Mousse Success
Even though this recipe is super straightforward, a couple of small things can make the difference between a good mousse and one that makes people ask for your secret recipe. I learned these tricks the hard way, so pay attention! These little details really boost your confidence when you’re making something new.
Chocolate Quality Matters
Please, please, please don’t skimp on the chocolate here. Since we aren’t baking it, the chocolate flavor is front and center. If you use waxy, low-quality chips, your mousse will taste waxy, too. I always recommend using baking bars that you chop yourself. Semi-sweet is perfect, but if you like it darker, you can use bittersweet, just make sure it melts smoothly. High-quality chocolate gives you that deep, rich flavor that makes this feel like a real treat.
Temperature Control for Folding
This is critical, especially when you’re mixing the chocolate into the yolks. If that melted chocolate is too hot, it will scramble your yolks, and you’ll end up with little bits of cooked egg instead of a smooth base. Let the chocolate cool down until it’s barely warm to the touch—you should be able to comfortably hold the bowl with both hands for a few seconds. If you’re unsure, wait another minute. A slightly cooler chocolate base is always safer than a hot one when dealing with raw eggs.
Frequently Asked Questions About This Festive Dessert
I get so many questions about making this dessert for the first time! It’s one of those recipes where people worry they’ll deflate the air. Don’t fret! Here are the things I hear most often about creating this easy mousse.
Q1. Can I make this easy mousse ahead of time?
Absolutely! That’s one of the best parts. You can make this festive dessert up to 24 hours in advance. Just keep it covered tightly in the refrigerator. If you chill it longer than 12 hours, let it sit on the counter for about 10 minutes before garnishing and serving so it softens up just slightly.
Q2. My egg whites didn’t get stiff peaks. What went wrong?
This usually happens for two reasons: either there was a tiny speck of fat (yolk, oil, or butter) in the bowl, or the bowl wasn’t totally clean. Egg whites need a completely clean, dry environment to whip up properly. If they look foamy but won’t stiffen, you can try adding a tiny pinch of cream of tartar to help stabilize them, though that’s not usually necessary for this recipe.
Q3. Can I use milk chocolate instead of semi-sweet?
You can, but I highly recommend sticking to semi-sweet or bittersweet for this festive dessert. Milk chocolate has much more sugar and fat, which can make the mousse too soft and overly sweet. The semi-sweet chocolate provides that necessary deep cocoa backbone that balances out the peppermint so beautifully.
Q4. How do I make sure the peppermint flavor is strong enough?
Peppermint extract varies wildly in strength! Start with the 1 teaspoon I listed, mix it into the chocolate, and taste that chocolate mixture before you fold in the eggs and cream. If you want a bigger kick, add another 1/4 teaspoon then. Remember, once you fold in the cream and whites, the flavor will mellow slightly.
Storing and Serving Your Chocolate Peppermint Mousse: Festive & Easy2026
Once you’ve made this show-stopping **Chocolate Peppermint Mousse: Festive & Easy2026**, you’ll want to know how to keep it perfect until serving time. The good news is that mousse is one of the best desserts for making ahead! Because it has no gelatin or stabilizers, it relies entirely on the air trapped in the cream and egg whites, so it needs that chill time to fully firm up.
Always garnish right before serving, especially if you’re using fresh mint or whipped cream, as those don’t hold up well overnight in the fridge. If you’re serving it from a large bowl instead of individual ramekins, just make sure you have a sturdy serving spoon ready!
Storage Table for Chocolate Peppermint Mousse
| Storage Location | Duration | Preparation Note |
|---|---|---|
| Refrigerator | Up to 3 days | Cover tightly with plastic wrap or use airtight containers. |
| Freezer | Not recommended | The texture will collapse when thawed due to the air and egg whites. |

Why You Will Love This Chocolate Peppermint Mousse: Festive & Easy2026
If you need a dessert that screams holiday cheer but whispers “I made this in under 30 minutes of work,” look no further than the **Chocolate Peppermint Mousse: Festive & Easy2026**. It truly checks every box for a busy host or a nervous beginner baker. Seriously, this recipe is a lifesaver when company unexpectedly drops by!
- It’s completely no-bake, freeing up your oven for everything else.
- The flavor combination of rich chocolate and cool peppermint is pure winter magic.
- The folding technique gives you a professional, airy texture without needing any fancy stabilizers.
- It looks incredibly sophisticated when garnished, making you look like a culinary genius!
- This **Chocolate Peppermint Mousse: Festive & Easy2026** is fast—active prep time is minimal.
Sharing Your Chocolate Peppermint Mousse: Festive & Easy2026 Creations
I absolutely love seeing your holiday bakes! When you make this **Chocolate Peppermint Mousse: Festive & Easy2026**, please snap a picture and share it with me on social media. Don’t forget to leave a rating right here on the blog—your feedback helps other cooks feel confident trying it out. Happy mixing, everyone!
Print
Chocolate Peppermint Mousse: 5 Star Easy Magic
- Total Time: 2 hours 30 minutes
- Yield: 4 servings 1x
- Diet: Vegetarian
Description
A festive and simple chocolate peppermint mousse perfect for any occasion.
Ingredients
- 8 ounces semi-sweet chocolate, chopped
- 2 tablespoons unsalted butter
- 1 teaspoon peppermint extract
- 3 large eggs, separated
- 1/4 cup granulated sugar
- 1 cup heavy cream
- Whipped cream (optional garnish)
- Crushed peppermint candies or candy canes (optional garnish)
- Chocolate shavings (optional garnish)
- Fresh mint leaves (optional garnish)
Instructions
- Melt the chopped chocolate and butter in a heatproof bowl over a double boiler or in the microwave until smooth. Let it cool slightly.
- Stir the peppermint extract into the cooled chocolate mixture.
- Beat the egg whites until soft peaks form. Slowly add the sugar, beating until stiff peaks form.
- Whip the heavy cream until soft peaks form. Do not overwhip.
- Whisk the egg yolks until pale. Gradually mix in the melted chocolate mixture.
- Gently fold one-third of the beaten egg whites into the chocolate mixture to lighten it. Carefully fold in the rest of the egg whites until smooth.
- Fold in the whipped cream until it is fully mixed in.
- Spoon the mousse into serving dishes.
- Cover and refrigerate for a minimum of 2 hours, or until firm.
- Garnish with your chosen toppings before serving.
Notes
- Use high-quality semi-sweet chocolate for the best flavor.
- Ensure the egg whites are beaten well for proper mousse volume.
- Chill time is crucial for the mousse to set correctly.
- Prep Time: 25 minutes
- Cook Time: 5 minutes
- Category: Dessert
- Method: No-bake
- Cuisine: American
Nutrition
- Serving Size: 1 serving
- Calories: Estimate not provided
- Sugar: Estimate not provided
- Sodium: Estimate not provided
- Fat: Estimate not provided
- Saturated Fat: Estimate not provided
- Unsaturated Fat: Estimate not provided
- Trans Fat: Estimate not provided
- Carbohydrates: Estimate not provided
- Fiber: Estimate not provided
- Protein: Estimate not provided
- Cholesterol: Estimate not provided