Skip to content

No heading needs to be written for the introduction.
Hi, I’m Anna! 👩🍳 Cooking is my passion, and here on Mom’s Kitchen I share simple, delicious recipes that bring joy and warmth to your table. Whether you love spending time in the kitchen or you’re just looking for easy ideas for everyday meals, I’m so happy to inspire you with my recipes. Thank you for being part of this flavorful journey! 💛
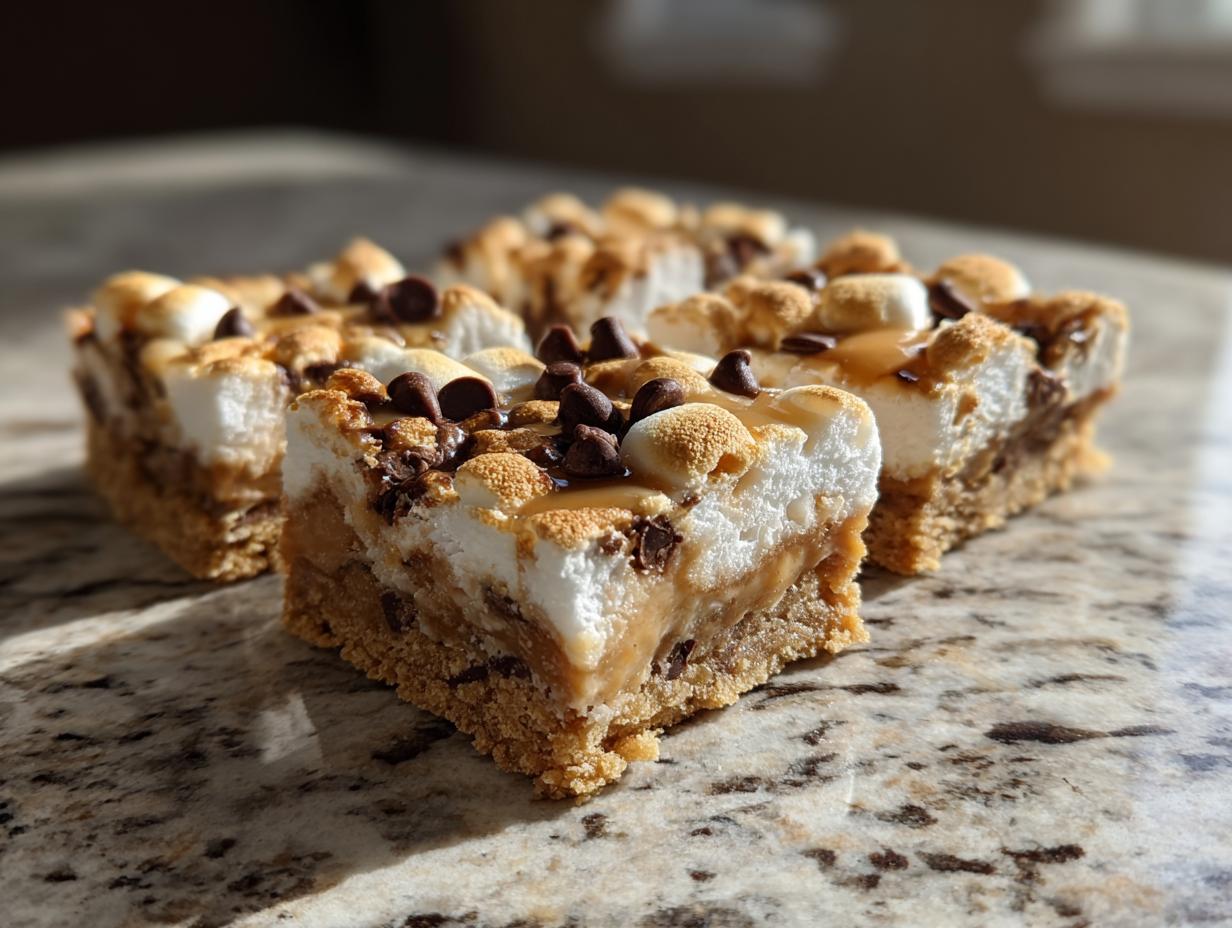
Today, we are making the absolute easiest, creamiest Peanut Butter Fudge you will ever lay eyes on. Seriously, this confection is my secret weapon when I need a guaranteed winner with minimal fuss. My philosophy has always been that great food doesn’t need complicated steps, and this fudge proves it. I first made this recipe when I was maybe ten years old, standing on a stool trying to reach the stovetop, and it turned out perfectly then—which tells you everything you need to know about how forgiving this recipe is for beginners!
Why You Will Love This Peanut Butter Fudge Recipe
Listen, if you think making candy is hard, you’ve been lied to! This recipe for Peanut Butter Fudge is pure magic because it requires almost no effort, but delivers that rich, nostalgic flavor we all crave. You need to try this because it’s faster than running to the store for a candy bar. We are talking about a stovetop wonder that sets up beautifully. You’ll get that dense, melt-in-your-mouth texture every single time. I promise you can whip this up after dinner and have dessert ready for the next day!
Quick Preparation for Busy Days
Forget complicated tempering or candy thermometers. Prep time here is just 10 minutes. That’s right, ten minutes! The actual cooking time on the stove is only about 5 minutes. Seriously, that’s it. Once it’s mixed, you just pour it and let it chill out in the fridge. This speed makes it perfect for last-minute gifts or when a serious sweet tooth strikes unexpectedly.
Simple, Accessible Ingredients for Easy Peanut Butter Fudge
I built this recipe on ingredients you probably already have sitting in your pantry right now. There’s no fancy sourcing required for this Peanut Butter Fudge. We use basic sugar, milk, butter, peanut butter, and vanilla. That’s the whole list! If you can measure five things, you can make this fudge successfully. It’s the ultimate proof that simple ingredients, when handled correctly, create the most satisfying homemade candy.
Gather What You Need for Perfect Peanut Butter Fudge
Before we even turn on the stove, we need to make sure everything is ready to go. When you’re making stovetop candy like this Peanut Butter Fudge, speed is important once the heat comes off. Having your pan lined and your measuring cups ready prevents panic later on! This recipe is designed to be foolproof, but preparation is half the battle, trust me.
Essential Ingredients List for Peanut Butter Fudge
You only need five things, but the exact amounts are key for that creamy set. Don’t try to eyeball these measurements!
| Item | Quantity | Note |
|---|---|---|
| Sugar | 2 cups | Granulated white sugar |
| Milk | 1/2 cup | Any kind works fine |
| Unsalted Butter | 1/4 cup | Cut into a few pieces for faster melting |
| Peanut Butter | 1 cup | Creamy works best for smoothness |
| Vanilla Extract | 1 teaspoon | Pure vanilla makes a difference |
Necessary Tools and Equipment
You don’t need any fancy gadgets for this, just the basics. Make sure your saucepan is heavy-bottomed so the sugar doesn’t scorch!
- Heavy-bottomed saucepan (medium size is perfect)
- 8×8-inch baking pan
- Aluminum foil
- Heat-safe spatula or wooden spoon for stirring
- Measuring cups and spoons
Step-by-Step Instructions for Making Peanut Butter Fudge
This is where the magic happens, and honestly, it’s so quick you’ll think you missed a step! The key to perfect Peanut Butter Fudge is moving swiftly once the sugar mixture comes off the heat. Don’t walk away from the stove, but also, don’t panic. We are keeping this simple, following the process exactly, and you’ll have rich candy in under 20 minutes of active time.
Preparing the Pan and Setting Up
First things first, let’s get our home base ready. Grab that 8×8-inch pan. I want you to line it completely with a sheet of aluminum foil. Make sure you leave plenty of overhang on two opposite sides—this creates little handles later, which is how we lift the entire block of fudge out once it’s set. Don’t worry about greasing the foil; you just want the foil to act as a sling. Set this prepared pan aside right next to your workstation. Remember, this fudge sets up fast, so you want to be ready to pour as soon as it’s mixed.

Cooking the Sugar Base for Your Peanut Butter Fudge
Now we move to the saucepan. Add your 2 cups of sugar, the 1/2 cup of milk, and the 1/4 cup of butter pieces. Turn the heat to medium. We need to stir this mixture constantly until the butter is fully melted and the sugar has dissolved. Once it starts bubbling—that’s the boil—set your timer immediately for exactly five minutes. Do not stop stirring gently during this five-minute boil; we want to prevent scorching on the bottom, which ruins the texture of the final Peanut Butter Fudge. Five minutes on a steady boil is crucial for the sugar crystals to reach the right stage. Understanding the science behind sugar crystallization can help ensure success!
Mixing in the Creaminess
When that timer goes off, yank the saucepan straight off the burner. This is important: stop the cooking process instantly! Now grab your peanut butter and vanilla. Drop them right into the hot sugar mixture. You need to stir vigorously and constantly now until everything is completely combined and you have one beautifully smooth, thick, light-brown batter. Seriously, keep stirring until you don’t see any streaks of white sugar or lumps of peanut butter. If it looks grainy here, keep stirring—it usually smooths out!
Cooling and Setting the Homemade Fudge
Once it’s perfectly smooth, don’t waste a second! Pour that glorious mixture right into your prepared, foil-lined 8×8 pan. Use your spatula to spread it evenly, but don’t press down too hard! We aren’t trying to compress it; we just want an even layer. Let it sit on the counter for about 30 minutes to cool slightly, and then transfer the whole pan into the refrigerator. It absolutely must chill until it is completely firm—I usually leave mine for at least two hours, but overnight is best. Once it’s rock solid, use those foil handles to lift it right out, peel the foil off, and cut it into about 16 squares.
Tips for Success with Your Peanut Butter Fudge
Making candy can feel intimidating, but honestly, this recipe is so straightforward. The main pitfalls people run into with Peanut Butter Fudge usually involve texture—either it’s grainy or it just won’t set up properly. I learned these tricks through trial and error, and they are the reason my fudge always comes out perfectly creamy. Trust me when I say paying attention to these small details makes a huge difference in the final product. If you want to learn more about my kitchen philosophy, check out my About Me page!
Achieving the Right Texture
The biggest texture mistake happens during the boil. You must boil the sugar, milk, and butter for the full five minutes, no less! This ensures the sugar reaches the proper crystallization point. However, once you take it off the heat, you need to stir with purpose but without being overly aggressive. Too much frantic beating after the peanut butter goes in can incorporate too much air, leading to a crumbly texture rather than that signature smooth melt. Stir until it’s just combined and glossy.
Ingredient Temperature Considerations
While this recipe is fast, the temperature of your peanut butter does matter a little bit. If you use peanut butter straight from the fridge, it will be stiff and make it really hard to get a smooth mix once it hits the hot sugar syrup. Try to let your peanut butter sit out on the counter for about 30 minutes before you start cooking. Room temperature peanut butter incorporates much more easily, ensuring your final batch of Peanut Butter Fudge is uniform and creamy all the way through.
Peanut Butter Fudge Frequently Asked Questions
I get so many questions about this recipe because everyone wants that perfect, melt-in-your-mouth bite of Peanut Butter Fudge! It’s easy to run into little snags, especially when working with sugar, but don’t worry. Here are the top things folks ask me when they are making their first batch of easy candy.
Can I substitute the type of peanut butter in this Peanut Butter Fudge?
You absolutely can! For the absolute creamiest fudge, I recommend sticking to creamy peanut butter, as it blends seamlessly. However, if you love those little bursts of nuttiness, crunchy peanut butter works just fine. Just be aware that the crunchy bits will give your final homemade fudge a slightly less uniform texture. It’s a flavor preference, really!
How long does homemade fudge last?
This is the best part about simple homemade fudge—it lasts a while! If you store it properly in an airtight container at cool room temperature, it stays great for at least a week, maybe even two. If your kitchen runs really warm, it’s safer to keep it in the fridge, though I find it’s best enjoyed when it’s not ice cold. For tips on food safety and storage, checking official guidelines is always a good idea, like those provided by the FDA.
Why did my fudge turn out grainy?
Graininess almost always comes down to the sugar cooking stage. If you didn’t boil the sugar mixture for the full five minutes, the sugar crystals didn’t dissolve completely. Alternatively, if you didn’t stir vigorously enough after adding the peanut butter, you might have unincorporated sugar clinging to the bottom. Just remember: boil fully, then stir smoothly!
Storing and Serving Your Classic Peanut Butter Fudge
Once you manage to cut this glorious Peanut Butter Fudge into squares, the last thing you want to do is let it go stale! Luckily, this recipe is quite sturdy compared to delicate baked goods. It’s perfect for making ahead for parties or holidays because it holds up so well. Serving it is easy—just grab a square! But storing it correctly ensures you get that perfect, soft bite every time you reach for a piece.
Best Practices for Keeping Peanut Butter Fudge Fresh
My original notes say to keep this candy at room temperature, and that’s usually true! The best practice is to stack the cut squares in a single layer, separated by wax paper if you are stacking them high, inside a sturdy, airtight container. At a cool room temperature, your homemade fudge should stay fantastic for up to two weeks. That said, if you live somewhere really hot and humid—like down here in the summer—the butter content might get a little soft. If that’s the case, pop that airtight container into the refrigerator for firmer results. It’s still delicious cold, but let it sit out for 15 minutes before serving for the best texture.

| Storage Method | Duration | Best For |
|---|---|---|
| Airtight Container (Room Temp) | 1-2 Weeks | Optimal flavor and texture |
| Airtight Container (Refrigerator) | Up to 3 Weeks | Hot or humid climates |
Understanding the Nutrition in Peanut Butter Fudge
Now, I know what you’re thinking—is this delicious, creamy Peanut Butter Fudge secretly a health food? Well, maybe not exactly, but it’s good to know what you’re enjoying! Because this recipe uses simple ingredients like sugar and peanut butter, the nutrition can vary slightly depending on the exact brand of peanut butter you use (especially if you use crunchy versus creamy). But I wanted to give you a general idea of what’s in one of these wonderful squares. If you are interested in the general nutritional profile of peanuts, you can check out resources like the USDA database.
This is candy, so it’s naturally high in sugar and fat, but it also packs a decent punch of protein thanks to all that peanut butter! Remember, these are just estimates based on the standard recipe, but it gives you a good baseline. Enjoying this homemade fudge in moderation is always the best approach!
Nutritional Estimates for Homemade Peanut Butter Fudge
Here’s a quick look at what one square (about 1/16th of the batch) generally contains. Treat yourself!
| Nutrient | Estimated Amount (Per Square) |
|---|---|
| Serving Size | 1 square |
| Calories | Approx. 200 |
| Sugar | Approx. 25g |
| Fat | Approx. 10g |
| Protein | Approx. 4g |
| Carbohydrates | Approx. 26g |

Make amazing Peanut Butter Fudge in 10 minutes
- Total Time: 15 minutes plus cooling time
- Yield: About 16 squares 1x
- Diet: Vegetarian
Description
Creamy Peanut Butter Fudge is a simple, satisfying confection. You mix basic ingredients to create a rich, smooth treat. This recipe delivers classic flavor fast.
Ingredients
- 2 cups sugar
- 1/2 cup milk
- 1/4 cup unsalted butter
- 1 cup peanut butter
- 1 teaspoon vanilla extract
Instructions
- Line an 8×8-inch pan with foil.
- Combine sugar, milk, and butter in a saucepan. Bring the mixture to a boil for 5 minutes.
- Remove the saucepan from the heat. Stir in the peanut butter and vanilla until the mixture is smooth.
- Pour the fudge into the prepared pan. Cool completely, then refrigerate until firm. Cut into squares before serving.
Notes
- Store in an airtight container at room temperature.
- Prep Time: 10 minutes
- Cook Time: 5 minutes
- Category: Dessert
- Method: Stovetop
- Cuisine: American
Nutrition
- Serving Size: 1 square
- Calories: Approx. 200
- Sugar: Approx. 25g
- Sodium: Approx. 50mg
- Fat: Approx. 10g
- Saturated Fat: Approx. 3g
- Unsaturated Fat: Approx. 7g
- Trans Fat: 0g
- Carbohydrates: Approx. 26g
- Fiber: Approx. 1g
- Protein: Approx. 4g
- Cholesterol: Approx. 10mg